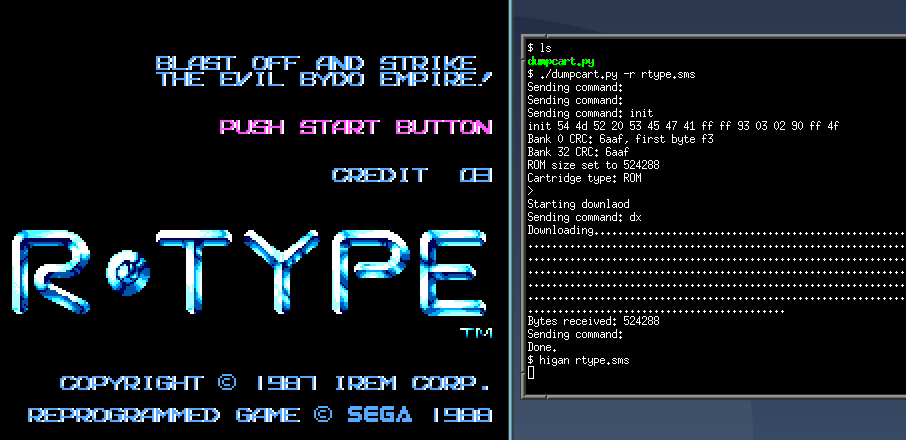
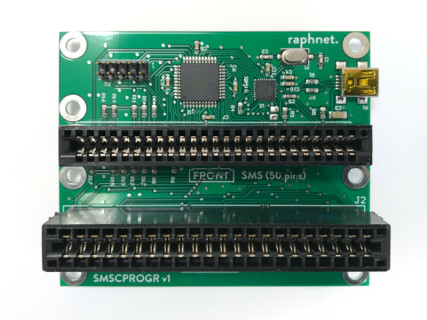
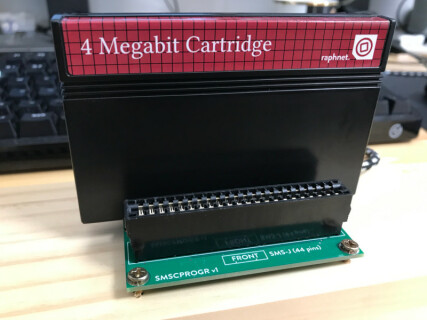
SMS/Mark-III cartridge reader/programmer
Overview
I recently designed a game cartridge programmer/reader for the Sega Master System (SMS) / Mark III / Game Gear ecosystem, because I wanted to program the SMS and Game Gear flash cartridges I designed, but as it turns out, it is also quite useful to try out games from my cartridge collection in emulators.The current features of this project are:
- Supports SMS 50 pin cartridges (Europe/America)
- Supports SMS-J/Mark-III/SG-1000 44 pin cartridges (Japan)
- Supports Game Gear cartridge (using an adapter)
- Supports Sega Cards / Mycard (using a "Card Catcher")
- USB Communication (CDC-ACM, aka virtual comm port)
- ROM size auto-detection and download by XModem
- Supports Sega-style mappers (only uses slot 2 / address $FFFF)
- Can program MX29F040-based flash cartridges
SMS support (50 and 44 pins)
My design features two slots, one for each type of SMS cartridge (Japan vs. overseas). Not much to mention here, except that one must take care not to insert the cartridge in the wrong slot!Game Gear support
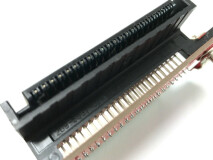
There is no dedicated Game Gear cartridge slot on-board, but I also designed an adapter which uses the 50 pin SMS slot:I was not able to locate a source for new Game Gear connectors (reproduction or original) so instead, I bought a nearly "total loss" console on an auction site. It had dirt, rust, leaked batteries, bad capacitors... you name it. Thankfully, the cartridge connector was still usable!
If you know a store that sells Game Gear connectors (new or refurbished) please let me know. It would be nice if I could make ready to use adapters.
Meanwhile, the circuit boards (without a connector) are available from my online store, for those who would like to build their own adapter.
Sega card / Mycard support
My design does not have a Sega card / My card slot either, but those can be easily read using a Card Catcher:SG-1000 support
The 44 pin cartridge slot can also be used to read SG-1000 cartridges. (And also very likely SC-3000 cartridges as well)Python GUI
Warning: Never insert/remove a cartridge when the power is ON. (disconnect the USB cable first!)There is now a user interface based on PySimpleGUI. At the moment it is only tested under Linux and is distributed in source code format, but eventually I plan to use pyinstaller to make something easier. To run it, make sure you have the required python packages installed and start client/smsp.py.
At the time of this writing, the UI features are:
- Can read normal game cartridge ROMs
- Can erase, blank check, program and verify supported flash cartridges
- Hex view of the loaded file or content read from a cartridge.
- Displays MD5 sum (useful to validate a ROM dump)

Reading a ROM (manually)
Warning: Never insert/remove a cartridge when the power is ON. (disconnect the USB cable first!)This circuit connects to a PC through USB and works as a virtual serial port. Under Linux, a character device such as /dev/ttyACM0 should appear when you connect the cable. Under Mac it should be similar, but the character device will have a different name. Under Windows 10, it should be COMx.
To connect to the reader, you simply start your favorite communication software (for instance, minicom under Linux) et point it to the virtual serial port. You may then interact with the firmware using keyboard commands. You may type ? followed by ENTER to show help:
> ?
Supported commands:
  boot    Enter DFU bootloader
  reset    Reset the firmware
  init    Init. mapper hw, detect cart size, detect flash...
  r     addresshex [length]
  dx    Download the ROM with XModem
  ux    Upload and program FLASH with XModem
  ce    Perform a chip erase operation

>
dx command to download the ROM contents, you should run the init
command to auto-detect the ROM size.The ROM size is determined by detecting after which 16k bank the contents starts to repeat. This works fine for all the games I tested so far, but I do plan to add a way to manually specify the size in a future version. (Sooner or later, according to demand or my own need, whichever comes first)
> init
54 4d 52 20 53 45 47 41 4d 57 eb 74 04 51 00 4c
Bank 0 CRC: c1b6, first byte f3
Bank 1 first byte: 45
Bank 2 first byte: 00
Bank 4 first byte: 00
Bank 8 CRC: c1b6
ROM size set to 131072
Cartridge type: ROM

>
> dx
Dumping the rom using XMmodem. 1024 blocks.
Please start the download... CTRL+C to cancel.
Reading a ROM (python script)
I also created a small python script to automate the steps given in the previous section. The script is called dumpcart.py, and the help (-h argument) at this time displays the following:
usage: dumpcart.py [-h] [-i] [-r OUTFILE] [-p INFILE] [-d DEVICE]

Dump/Program tool for smscprogr

optional arguments:
  -h, --help            show this help message and exit
  -i, --info            Provide information about the cartridge
  -r OUTFILE, --read OUTFILE
                        Read the cartridge contents to a file.
  -p INFILE, --prog INFILE
                        (Re)program the cartridge with contents of file
  -d DEVICE, --device DEVICE
                        Use specified character device.
./dumpcart.py -d /dev/ttyACM0 -r supergame.sms

Programming a cartridge (manually)
Using your communication software (such as minicom under Linux) you should first type theinit command, which should detect the flash chip. (As shown by
the last line below)> init
init 54 4d 52 20 53 45 47 41 ff ff 51 8a 99 99 00 4c
Bank 0 CRC: da45, first byte f3
Bank 1 first byte: 78
Bank 2 first byte: dd
Bank 4 first byte: 44
Bank 8 CRC: da45
ROM size set to 131072
Cartridge type: FLASH. Manufacturer ID=0xc2, Device=0xa4 => MX29F040 (supported)
Before writing however, the contents of the cartridge (or rather, the flash chip contained within) must be erased using the
ce (Chip Erase) command:> ce
Erasing chip...
Done.
>
ux command:
> ux
READY. Please start uploading.
The flash chip is programmed on the fly during the upload. When the upload ends, programming is complete.
Important: Do not forget to disconnect the USB cable before removing your cartridge!
Programming a cartridge (python script)
The python script I wrote can also automate the steps necessary to program a cartridge. (See also the Reading a ROM (python script) section)To program a game, for instance, my homebrew donkey.sms, I use the following command:
./dumpcart.py -d /dev/ttyACM0 -p donkey.sms
ce command), of starting the upload (ux command)
and of uploading the contents of the file passed in argument (donkey.sms in this example) using the XModem protocol.Sending command: ce
ce
Erasing chip...
Done.
>
Starting upload
Sending command: ux
Uploading
Upload completed with success.
Sending command:
Done.
Important: Do not forget to disconnect the USB cable before removing your cartridge!
Firmware
The firmware is open source in the hope that anyone who need to change something to better suit their needs or add new features (supporting other flash types or another mapper for instance) can do it on the spot and with ease.That said, don't hesitate to contact me if something is not working or need a new feature. I'll see what I can do.
| Version 1.0 February 5, 2021 (Friday) |
|---|
|
| File(s): smscprogr-1.0.hex (32.8 KB) |
 This project is also available on GitHub!
To request features, report issues or contribute, you may send me an email or use the GitHub repository:
https://github.com/raphnet/smscprogr
Updating the firmware
The firmware is programmed into the micro-controller using the Atmel DFU bootloader. Under Linux, you can use a tool called dfu-programmer. This example is based on Linux, but dfu-programmer also exists for Windows.Step 1: Entering bootloader mode
dfu-programmer looks for an Atmel DFU USB device, not a virtual serial port, so theboot
command must first be sent to the firmware to request execution of the bootloader. As soon as this command is
received, the virtual serial port will disappear and your communication program will likely show an error
message, but in the background the micro-controller will appear on the USB BUS with a new identity (Atmel
Atmega32u2 in bootloader mode).Step 2: Erasing, programming and starting the firmware
Just ignore the error in your communication software and open another terminal, then use dfu-programmer to erase, program and finally start the new firmware.dfu-programmer atmega32u2 erase
dfu-programmer atmega32u2 flash smscprogr-1.0.hex
dfu-programmer atmega32u2 start
Windows
Under a typical Windows 10 system, the programmer should appear as COM3.I would recommend using Tera Term to communicate with the programmer. Tera Term is available here:
https://ttssh2.osdn.jp/index.html.en
The commands you need to type (init, ce, ux, dx, etc...) are as exposed above. When the time comes to transfer a file (programming or dumping a cart) you must start an XMODEM transfer in the correct direction from the File->Transfer->XMODEM menu:

Disclaimer
I cannot be held responsible for any damages that could occur to you or your equipment while following the procedures present on this page. Also, I GIVE ABSOLUTELY NO WARRANTY on the correctness and usability of the informations on this page. Please note, however, that the procedures above have worked in my case without any damages or problems.Now you cannot say that I did not warn you :)


